


The Power of Pollinator Plants
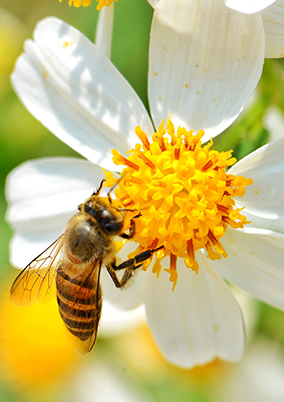
Are you looking to pack some “pollinator power” into your garden? If you don’t already have them, try adding plants that attract pollinators, like bees and butterflies. When pollinators feed on the pollen and nectar of the plants they are attracted to, some of that pollen and nectar clings to them, and as they forage around your garden it spreads itself onto other seeds and plants to help them germinate, fertilize, and thrive. So, what are some tips for getting started with a pollinator garden?
- Plant native plants, which produce flowers that are rich in nectar and pollen, such as coneflowers, aster, lavender, salvia, sunflowers, zinnias, and herbs such as oregano and basil.
- Include plants with different bloom times, so you have beautiful color and pollinators in your garden throughout the growing season.
- Group the same plants together to make it easier for pollinators to collect and spread pollen and nectar. Not all pollinators will be attracted to the same plants.
- Avoid pesticides, which harm pollinators.
- If you have a container garden on a windy balcony, install a windbreak such as a trellis or a screen. If your balcony is mostly shaded, include pollinator plants that thrive with less sun, such as columbine or honeysuckle.
It’s estimated that one out of every three bites of food we eat exists because of pollinators. So, pollinator gardens are a win-win. Food for pollinators means food for us too.
A Kid’s Room They’ll Love to Spend Time In
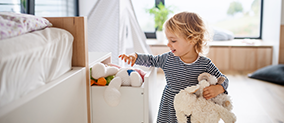
If you are a parent, you know that getting your kids to go to their room isn’t always easy. So, here are some top hacks to design a room your kids will love.
Have a place for everything — a place to hang and fold clothes, bins for toys, and shelving for books, all at their height (or have a step stool) so they can do their own housekeeping. As for art, stickers, photos, etc., provide damage-free ways of putting them on the walls (e.g., a cork board for pinning, a sheet of galvanized metal with magnets, or a string hung on the wall with clothes pins).
Provide acceptable places for drawing when inspiration strikes, such as a section of a wall with a chalkboard or a standing easel with paint.
Every kid loves a hideout, so why not create one? A DIY idea could be a child-sized tent or a cozy book nook with a bean bag chair and string lights, for example.
Lastly, make homework palatable by providing an area with good lighting and ample desk space. Consider a bunk-style bed on top, with a desk underneath to conserve space.
To tie it all together, play with fun accents, such as a statement lighting piece, accent wallpaper, or a hanging chair.
Include your child in the design fun, and not only will they have a cool new room, but you can bond over their room refresh, too.
Painting Tips and Tricks
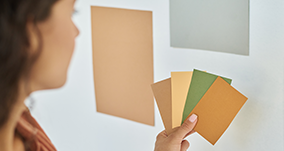
If you are looking at your walls and are thinking that they need a fresh coat of paint or just want to switch things up with a new color, read on for some tips to make your paint job a smooth one.
- Paint samples onto paper and hang them on the wall. Look at the colors in different lighting to see if it’s really the color you desire.
- Determine which kind of primer you need, if any (e.g., wood, drywall, masonry, or a paint and primer in one). If the walls are in good condition or the colors are not a drastic change, you may not need a primer.
- Choose a sheen suitable for its use (e.g., satin enamel works well for rooms with moisture, like kitchens and bathrooms).
- Cover furniture and flooring with plastic sheeting.
- Fill small holes or cracks with filler or spackle, let it dry, and then sand it. Then wipe down the area you will be painting with a mild soap solution to remove any dust, which would affect the paint’s adherence.
- Next, tape off the room by applying paint tape to the boundaries you are painting around.
- Paint the ceiling first, then the walls, and end with the trim.
- Let the first coat fully dry to prevent cracks and peeling. After the second coat, decide if you want a third coat.
Happy painting!